

Log chinking supplies. The complete supply checklist for chinking your log home.
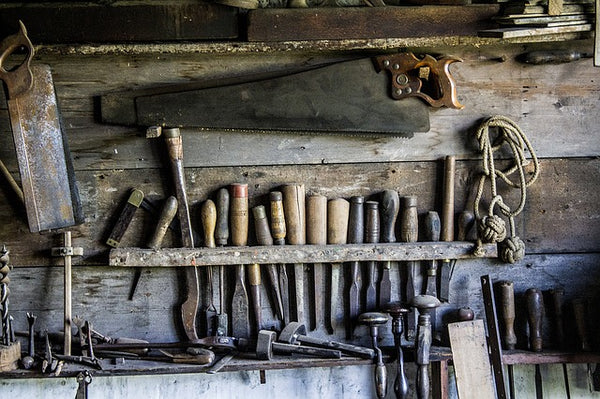
If you are thinking about chinking your log home yourself, you might wonder, what tools will I need for chinking? The answer will depend on which method you choose. The main tools that you will need for chinking are:
Scraper for chinking.
Scraper is one of the simplest and cheapest chinking tools. This metal tool is usually used for removing the cambium and bark from hard to reach areas such as knots. It's a bit time consuming method and requires technique but everything comes with practice.
Log cleaner for chinking.
One of the main steps of log chinking is a preparation stage. Many people ask, if they need to clean the logs before chinking. The answer is yes! For chinking to establish good adhesion to the logs you should polish wood surfaces. Cleaners are used to clean and brighten bare logs and wood, and restore luster and vibrancy. Cleaners effectively kill mold, mildew and fungus, while also removing dirt, dust, pollen and other surface contaminants. Make sure you prepare the logs well because it's the base for a long life. Learn more about log cleaners here.
Backer Rod
Backer Rod is a synthetic foam that comes in a variety of shapes and sizes from 1/4" up to 5". It provides a surface that chinking won't adhere to. In the end, the chinking will free itself from the backer and will move with the logs as they expand or shrink. Backer Rod also serves by adding an insulation value and reduces the amount of material needed. You can learn more about Backer Rod types and sizing in this article and compare products here.
Caulking gun, bulk loading gun, or power chinker
If you are still not sure what type of tool to use for applying your chinking, then analyze your end goal, resources, and the size of your log home. These are the main factors that matter We've already told you about the 5 chinking methods, have a look at it and maybe you will find a suitable one for you there. Caulking gun, bulk loading gun, and power chinker are the tools used for applying chinking into the joints. These tools save a lot of time and require less effort since they are partially automated, so if you have some extra money it's worth considering. Guns usually come with different sizes of nozzles so that you can reach the narrowest areas in the log.
Misting Bottle for chinking.
Modern acrylic chinking is water based. It is easy to fix the flaws of applying chinking if you made any simply by applying water. When applying water to chinking the idea is to smooth out the ripples caused by gunning, but most importantly, to feather the bead out onto the top and bottom logs at least 1/4" so that the chinking is tooled tightly to the log surfaces. Just make sure you keep a sponge and a container of clean water nearby and correct any errors right away before the chinking sets up. Don't forget that this is how your chink will look once it is dried.
Foam Brush for chinking.
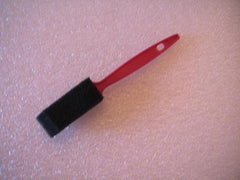
If you are a newly baked "chinker" you will most likely be going back over your work with a scraper or foam brush to clean up any mistakes to flatten the chinking out and to make sure it is adhering to the logs properly. How do you use a foam brush for chinking?
Using a damp polyethylene foam brush, hold the foam portion parallel to the bead, gently press the bead into place. Don't drag the foam brush down the bead, instead, section by section press the foam brush against the bead. Here is a great foam brush.
Buckets
Here's a small tip for you from professional chinkers. Buy 30-50 cheap foam brushes in a size slightly smaller than your anticipated chinking width. Then prepare 2 buckets of water. Put all brushes in one bucket. When brushing out the bead of chinking/caulking grab a brush out of the water, shake it well to get rid of the majority of water then brush over the chinking once. Then with a clean side of the brush use it once again. Then put it into the second bucket with clean water. The idea is to use each clean brush only once per side which will keep the edges clean.
Spatula or Putty Knife
Spatula and putty knives are used to apply chinking into hard to reach places and remove, if needed, extra chinking from the wood surface. This will help you to seal all the chinks in your log house and keep your work neat and clean helping you get rid of flaws. You can find compare and find the best match here.
Stapler or Adhesive
Adhesive is used to apply backer rod. First determine the correct size of backer rod. Lay various sizes into the joint and choose the size that fits well into the joint and keeps the flat surfaces snugly against the logs. Then place the chosen pieces onto a flat box, table or rack and spray the two upward exposed surfaces lightly with an adhesive.
Let adhesive dry until sticky, then carefully insert the backer-rod into the log joint and press firmly until it fits snugly between the logs. NEVER SPRAY ADHESIVE DIRECTLY ONTO THE LOGS! This will result in an unsightly film on the wood surfaces and will weaken the chinking bond to the wood causing adhesive failure in the joint.
If you have any questions, feel free to call and ask. There's no right tool or method. The key is to find the one that you will be comfortable with, it can even be a stick. Just make sure you do your work properly.